views
Script Editor
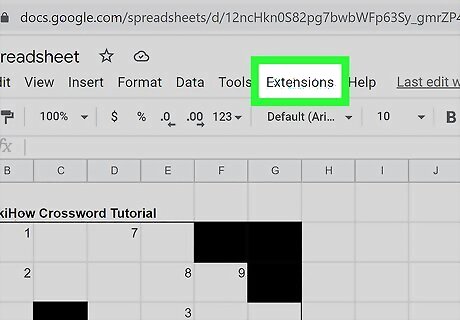
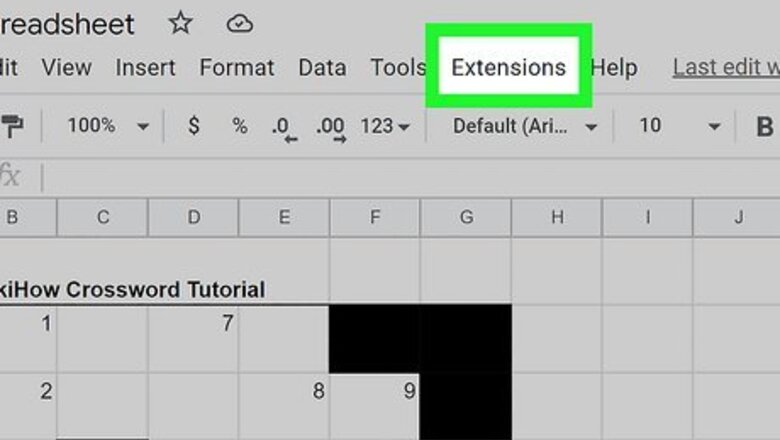
Click on Extensions. Using a script is an easy way to automatically insert timestamps into a Google Sheets spreadsheet. Once you apply the script, the rest of the process is fully automated. To get started, open your spreadsheet and click on the Extensions tab at the top of the window.
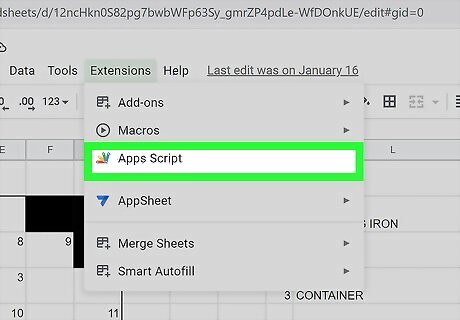
Select Apps Script. In the dropdown Extensions menu, select the Apps Script option. This will open a new tab where you can create a script that will be bound to your spreadsheet.
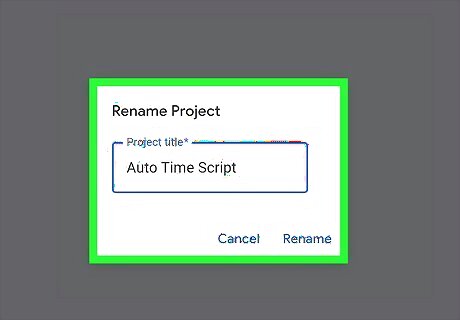
Give your script a name. At the top of the script editor window, you’ll see a box containing the default title Untitled project. Click the box and type in your own title to rename the script. It’s up to you what you want to call your timestamp script. Just choose something that makes sense for your project. For example, you could call it something like “AutoTimeandDate.”
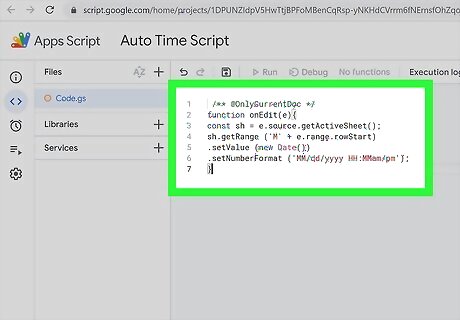
Paste the code into the scripting window. In the Apps Script window, you will see a grey box containing a few lines of code, starting with function myFunction(). Delete whatever is in the box and replace it with a script that will insert a timestamp, such as this one: /** @OnlyCurrentDoc */ function onEdit(e){ const sh = e.source.getActiveSheet(); sh.getRange ('M' + e.range.rowStart) .setValue (new Date()) .setNumberFormat ('MM/dd/yyyy HH:MMam/pm'); } This particular script will insert a timestamp into the specified column any time you enter data into a cell, in the same row as the data you entered. For instance, if you type something into cell A2, a timestamp will appear in cell M2. There are many different example scripts online that you can use for this purpose. Whichever one you choose, make sure to remove any smart quotes in the code and replace them with straight quotes, or the script won’t work properly.
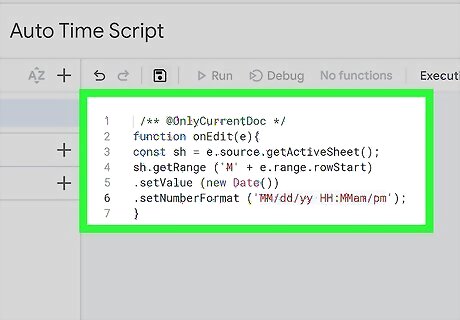
Make any changes you like to the code. If you want to edit where and how the timestamp will appear in your spreadsheet, you can make adjustments to the script. For instance, in our example script, you can change which column the timestamp appears in as well as the format of the time and date. The M in line 4 of the script indicates the column where the timestamp will appear. If you want it to appear in a different column, change it to whichever letter or column name you like (e.g., change M to B if you want the timestamp in column B). You can also change the number format in line 7 to display just the time, if you like. Simply delete the MM/dd/yyy
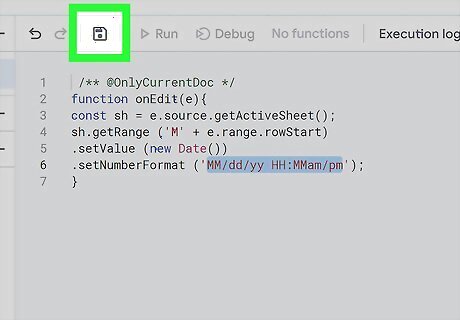
Click Save. Once you’ve got the script the way you like it, hit the Save project button at the top of the Apps Script project window. This will apply the script to your Google spreadsheet.
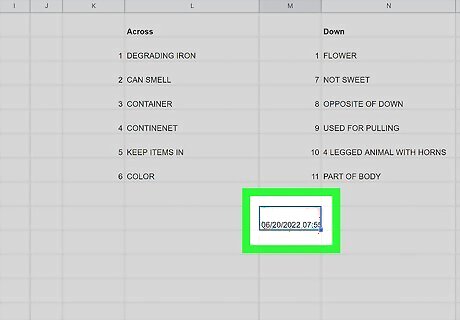
Enter data anywhere in your spreadsheet. Click back over to your Google Sheets tab and enter some data. The timestamp should appear in the same row, in whichever column you specified in your script.
Time and Date Formulas
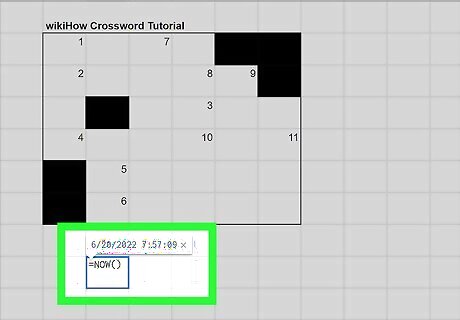
Insert the formula =NOW() into a cell to display the time and date. Select the cell where you want to show the date and time, and type in =NOW(). This will cause the current date and time to appear in that cell.
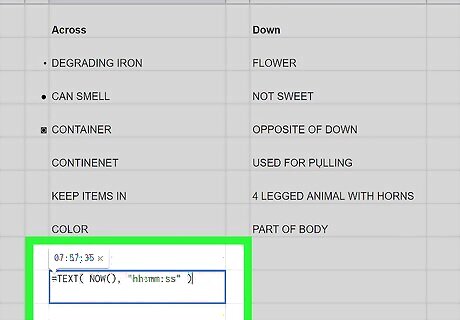
Use the formula =TEXT( NOW(), "hh:mm:ss" ) to show the current time. If you only want to show the timestamp and not the date, you can modify the formula using the TEXT() function. Copy and paste or type =TEXT( NOW(), "hh:mm:ss" ) into the cell where you want to display the time. If you prefer to display the time using a 24-hour clock instead of a 12-hour clock, capitalize HH in the formula. You can also add milliseconds by adding .000 after the ss at the end of the formula. That is, write the formula as =TEXT( NOW(), "hh:mm:ss.000" ). Add AM/PM to the end of the formula if you’re using a 12-hour clock and want to indicate the time of day more accurately. Format the formula like this: =TEXT( NOW(), "hh:mm:ss AM/PM" ).
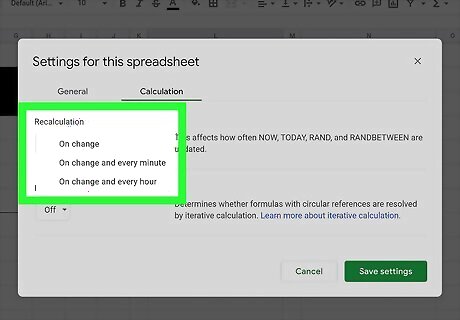
Change how often the timestamp updates in Settings. When you insert a timestamp using a formula, the time is not fixed. By default, it will update any time you make a change to the spreadsheet. While you can’t create a fixed timestamp using this method, you can modify how often it updates. To do this: Open the File menu. Select Settings to open the Settings for this spreadsheet dialog box. Click on the Calculation tab. Under the Recalculation heading, click on the dropdown menu and select how often you want the timestamp to update. The options are On change, On change and every minute, and On change and every hour. Click Save settings to apply the change.
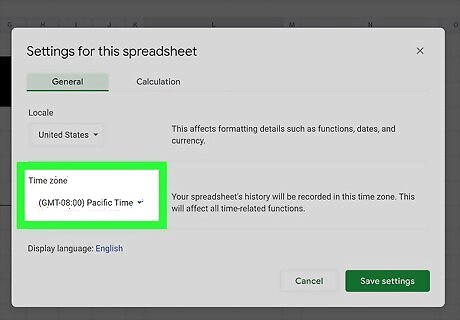
Use the General Settings to update your time zone. To make sure your formula displays the time correctly for your time zone, open the File menu and click Settings. In the Settings for this spreadsheet dialog box, click the General tab. Under Time zone, click the dropdown menu and select the correct time zone. When you’re done, click Save settings. You can also change your locale in the General Settings menu.
Keyboard Shortcuts (PC)
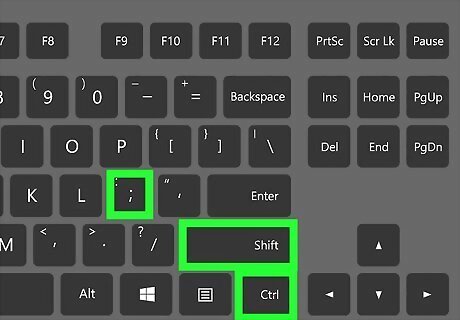
Insert the time into a cell with Ctrl+⇧ Shift+;. Click on the cell where you want to display the time and press Ctrl+⇧ Shift+; on your keyboard. This will display the current time in the format HH:MM:SS AM/PM in that cell. When you insert a timestamp using this shortcut, the time is fixed. It will reflect the time when you entered it and will not update if you make changes to the sheet.
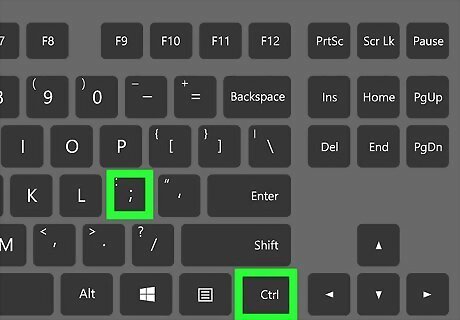
Add the date using Ctrl+;. Use this shortcut to show just the date without the time in the selected cell. It will display the date in the format M/DD/YYYY.
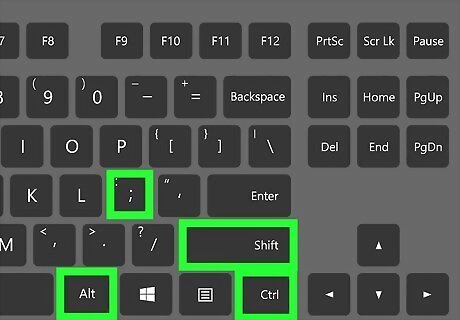
Use Ctrl+Alt+⇧ Shift+; to enter time and date. If you want to show both the time and date in a cell, select the cell and press the keys Ctrl+Alt+⇧ Shift+;. This will display the time and date in the format M/DD/YYYY HH:MM:SS.
Keyboard Shortcuts (Mac)
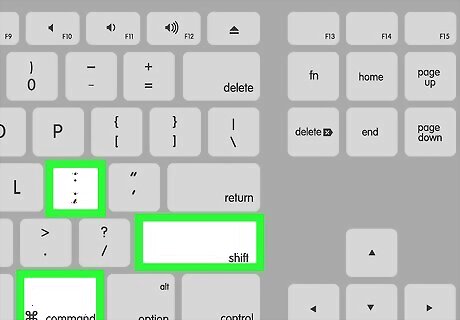
Press ⌘ Command+⇧ Shift+; to enter the time in a cell. If you’re using Google Sheets on a Mac, select the cell where you want to display the time and press ⌘ Command+⇧ Shift+;. Just like on a PC, this will display a fixed timestamp in the format HH:MM:SS AM/PM.
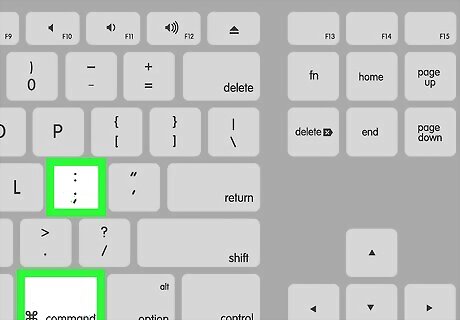
Insert the date with ⌘ Command+;. If you just want the cell to show the date and not the time, use the shortcut ⌘ Command+;. The date will display in the format M/DD/YYYY.
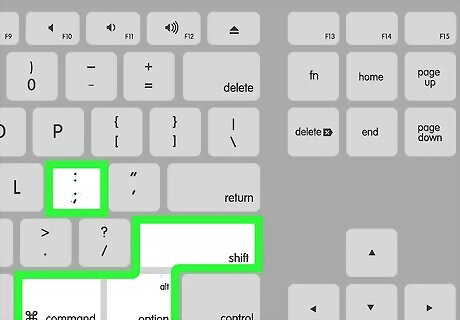
Input date and time with ⌘ Command+⌥ Option+⇧ Shift+;. This shortcut will show both the time and the date in the cell you selected, in the format M/DD/YYYY HH:MM:SS.


Comments
0 comment