views
Bypassing Login Password on Windows
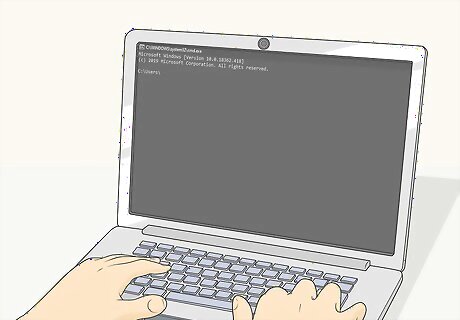
Understand what this will accomplish. This method covers manipulating the Sticky Keys accessibility feature of Windows, which allows you to reset the Windows administrator password. This should still work as of 2021. You'll need a Windows 10 installation DVD or USB drive, either of which you can create on a PC you do have access to. If the PC is protected by BitLocker, you'll need the BitLocker recovery key to use this hack. If you don’t have that key, it won't work.
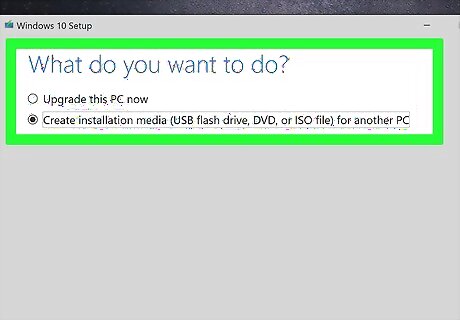
Create a Windows 10 installation disc or drive. Make sure that you have a blank flash drive that is at least 8 gigabytes in size (or a blank writable DVD), and then: Insert the USB flash drive or blank DVD. Go to https://www.microsoft.com/en-us/software-download/windows10 and click Download tool now. Double-click the downloaded tool to open it. Select Create installation media for another PC when prompted. Select USB flash drive when prompted if using a flash drive, and then follow the on-screen instructions to install. If creating a DVD, select ISO file when prompted. Once the ISO is created, select Open DVD burner and follow the on-screen instructions to create your boot DVD. Follow the on-screen instructions, choosing either your flash drive or a DVD when prompted.
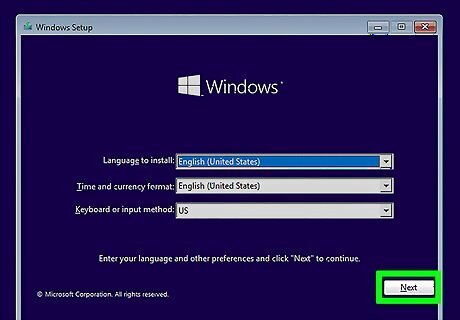
Boot the PC you want to hack from the install disc or drive. Insert the flash drive or DVD into the PC. Restart the PC. If you can't do that without a password, just turn the PC off and then power it back on. The PC should boot from the DVD or USB flash drive into the "Windows Setup" process.
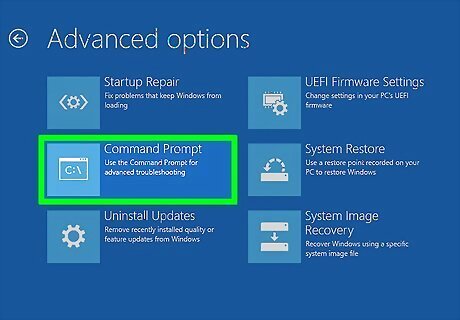
Open the command prompt. Here's how: Click Next on the setup screen. Click Repair. If the PC is protected by BitLocker, you'll be asked to enter the recovery key. Do that now. Click Troubleshoot. Click Command Prompt.
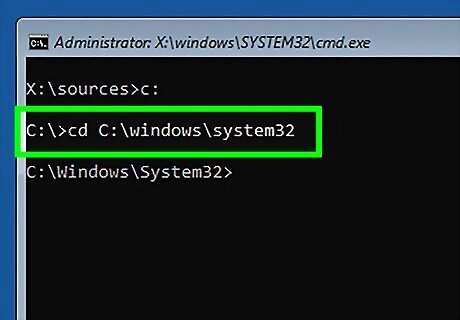
Change to the Windows\System32 directory. To do this, type cd C:\Windows\System32 and press the Enter key. As long as Windows is installed on the C drive, this should move you to that directory without error. If Windows is installed on the D: drive, use D:\Windows\System32 instead.
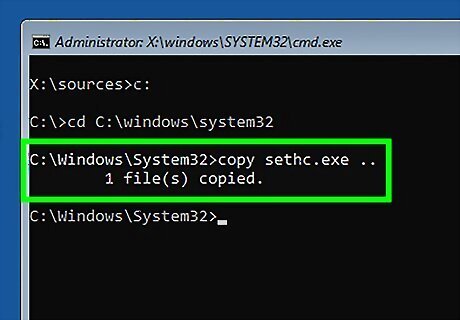
Copy Sticky Keys to the main Windows directory. To do this, type copy sethc.exe .. and press the Enter key. This makes a copy of the application called sethc.exe and saves it to C:\Windows (or D:\Windows). sethc.exe is the name of the Sticky Keys accessibility tool.
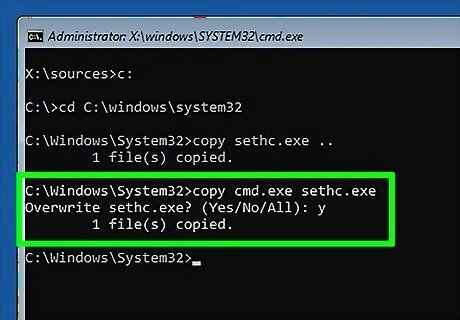
Replace Sticky Keys with the command prompt. To do this, just type copy cmd.exe sethc.exe and press Enter.
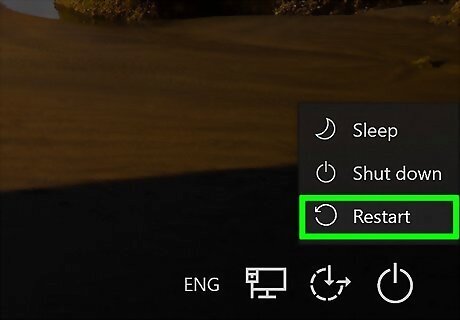
Restart the computer in Safe Mode. The steps to this hack have changed a bit since the release of Windows 10. While this wasn't necessary before, you'll now need to boot into Safe Mode to finish the job. Here's how: Click the X at the top of the window. On the error message, click Yes. The computer will reboot and go to the login screen. When you see the login screen, hold down the Shift key as you click the Power icon (the circle with a line at the top) and select Restart. Don't lift your finger from the Shift key until after you've clicked Restart! When the PC restarts again, click Troubleshoot, select Advanced Options, and then click Startup Settings. Click the Restart button. On the Startup Settings screen, press the 4 key on your keyboard to select Safe Mode. If that doesn't work, try the F4 key instead.
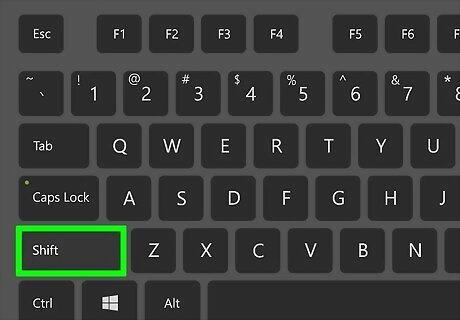
Press the ⇧ Shift key 5 times rapidly on the login screen. This login screen will appear when you restart in Safe Mode. Pressing the Shift key 5 times will open the command prompt window.
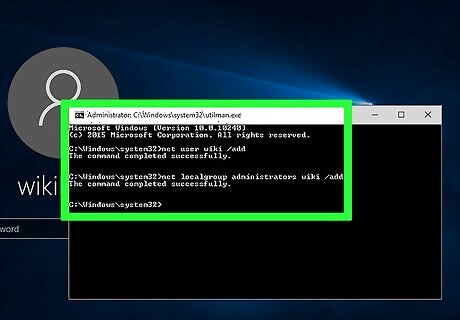
Change the password for any account and/or make an account an administrator. You can change the password for any regular user, create a new user, and/or change the Administrator account password. If you change a regular user's password or create a new user, you'll want to make that user an administrator so you can have full control over the PC. Here's how: First, type net user and press Enter to see a list of all accounts on the PC. To change a regular user's password, type net user user_name new_password. Replace "user_name" with the username, and "new_password" with whatever you want the new password to be. To activate a disabled administrator account, type net user Administrator /active:yes. This won't hurt if you're not sure whether the account is disabled or not—go ahead and do it anyway if you're wanting to log in as an administrator. Once you've enabled the administrator account, you can reset its password with the same command as you would a regular user: net user Administrator new_password. To create a new user, use net user new_user_name new_password /add. To make a user an administrator, use net localgroup Administrators user_name /add.

Log in with an administrator account. Now that you have access to an administrator-level account, close the command prompt window to return to the login screen, and then sign in with the username and password. If you created a new user and the PC is a part of a workgroup, you'll usually need to reboot the computer again before that user appears on the login screen.
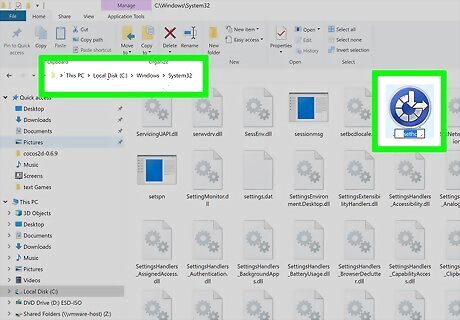
Restore the original Sticky Keys application. Your last step is to restore Sticky Keys to its original location. This brings back Sticky Keys' normal functionality and covers your tracks. Don't worry, you'll still be able to log in with the account you created or changed. Here's how: Once you're signed in, open the command prompt. To do this, press Windows key + S to activate the search bar, type cmd, and then click Command Prompt in the search results. Type Robocopy C:\Windows C:\Windows\System32 sethc.exe /B and press Enter. But, if C:\ isn't the correct drive, replace the drive letter in the command with the correct one.
Bypassing Login Password on macOS
Understand the limitations. While you'll be able to use the following method to bypass the login on most Macs, some Mac users will have enabled FileVault encryption and/or a firmware password, making it impossible to hack the Mac without knowing the password(s). When using this method, the user you're hacking will know that someone accessed their computer because their old password will no longer work.

Start your Mac in recovery mode. The steps to do this are different depending on whether the Mac has an Apple processor (typically Macs from November 2020 or later) or an Intel processor. Apple processor: Power down the Mac. Then, press and hold the power button as it starts up. Don't lift your finger. After a few moments, you'll see a message that says that if you keep holding down the power button, you'll be able to access startup options. You can lift your finger from the button when you see Options—click Options and select Continue to open recovery mode. Intel processor: Restart the Mac (or power on the Mac if it's off). As soon as the Mac restarts, hold down the Command and R keys at the same time until you see the Apple logo or a spinning globe.
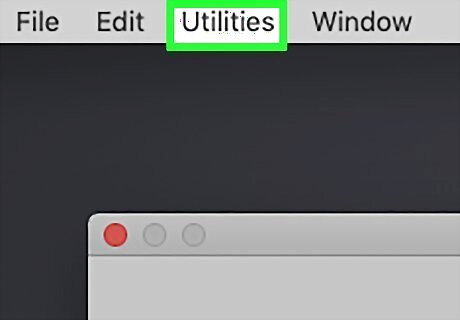
Click the Utilities menu. This menu item is at the top of the screen.
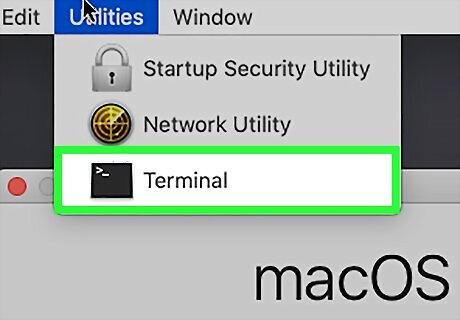
Click Terminal on the menu. This opens a Terminal window.
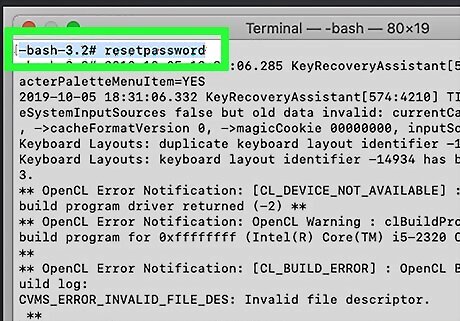
Type resetpassword and press ⏎ Return. Make sure not to put a space between "reset" and "password," as the command is just one word. A few Terminal commands will run, and the password reset window will open in the background.
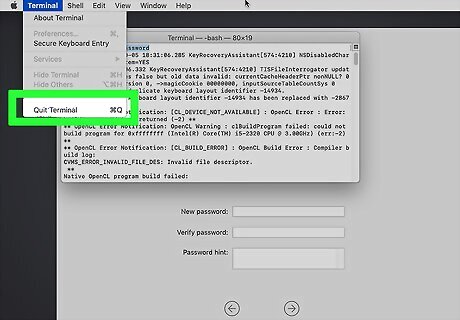
Close the Terminal window. You can do this by clicking the red circle at the top of the window. This makes it so you can see the password reset window.
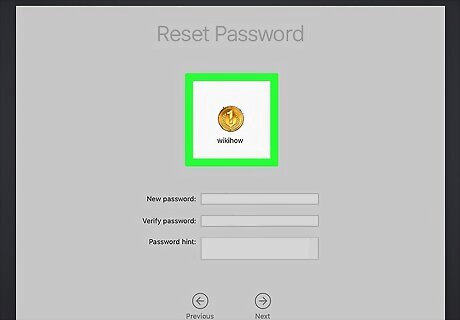
Select a user. Click the name of the user account you want to hack, then click Next at the bottom of the window.
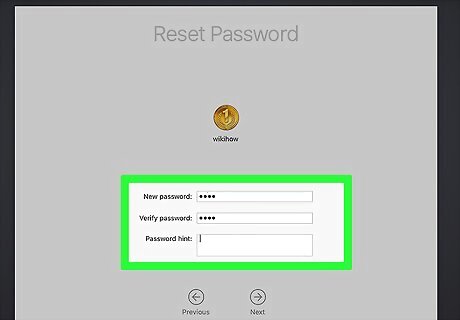
Create a new password. Fill out the following fields: New password — Enter your new password. Verify password — Re-type the password. Password hint — Add a hint for the password.
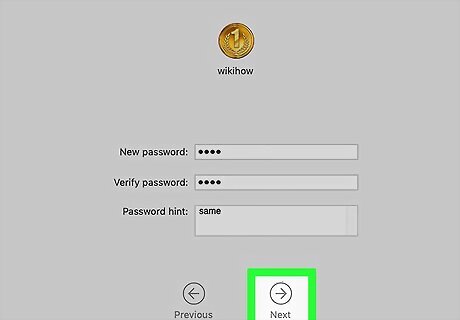
Click Next. It's at the bottom of the screen.
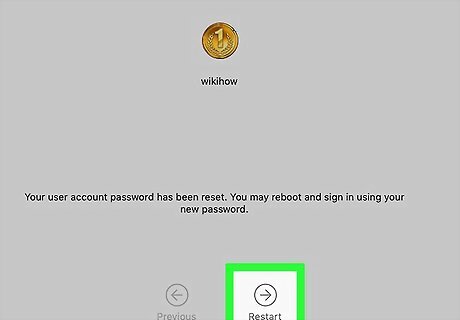
Click Restart. You'll find this option at the bottom of the screen. Clicking it prompts your Mac to begin restarting; when it completes, you'll be back at the login screen.

Log in with your new password. In the password box below the user you selected, type in the new password, then press ⏎ Return.

Click Continue Log In if prompted. This will allow you to continue logging in without setting up a new Keychain.
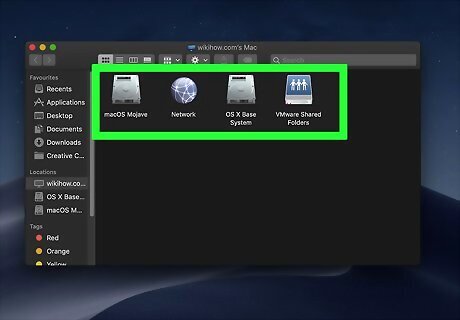
Browse the Mac as needed. Since you're on the user's account, you shouldn't have any limitations as long as they have administrator privileges. Note: Keep in mind that the password will be different than the user's last password, so they won't be able to log in with their old credentials.
Remotely Hacking via TeamViewer

Understand how this method works. You can only use TeamViewer to remotely control a computer if you are able to install TeamViewer on that computer. So, you'll need access to the remote computer first, which you can accomplish using either of the previous methods. Once you set up TeamViewer on the target computer, you'll have access to it over the internet. If you have physical access to the computer but you don't know the password, use the Windows or Mac bypass listed above.
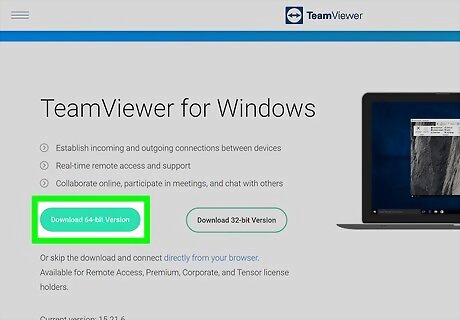
Install TeamViewer on your own computer. You can download TeamViewer from https://www.teamviewer.com/download. Once TeamViewer is installed, you'll need to create an account, which you can do by clicking Sign In at the top-left corner and choosing Sign Up. Depending on how you plan to use TeamViewer, you'll want to be careful about the username you create here—it can be used to identify you if you don't mask your identity well enough. When installing TeamViewer, choose the option that allows you to install it for personal use. This ensures that you don't have to pay to use TeamViewer.
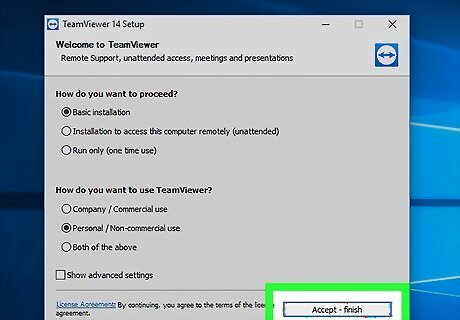
Install TeamViewer on the target computer. You'll need to do this when you have access to the remote computer. The version of TeamViewer you install on the remote computer is the same one you have on your own computer.
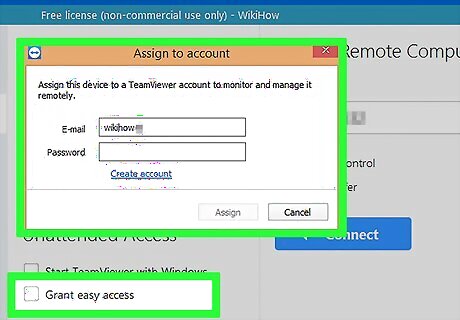
Set up Unattended Access on the target computer. Once you install TeamViewer, you'll see the option to set up Unattended Access. This is crucial, as it will allow you to connect to the computer remotely without someone having to approve your connection. Here's how to do it: First, log in with your TeamViewer account. Check the box next to "Start TeamViewer with Windows" (PC) or "Start TeamViewer with System" (Mac). This ensures that TeamViewer is always running even if someone restarts the computer. Check the box next to "Grant easy access." Click Computers and Contacts in the left panel. Click the icon that looks like a person with a plus sign and select Add this computer. Enter a name for the computer and create a password. You'll need to remember this username and password, so write them down! Click Finish. Click the Remote Control tab on the left panel. Write down the number next to "Your ID." You'll need that to connect as well.
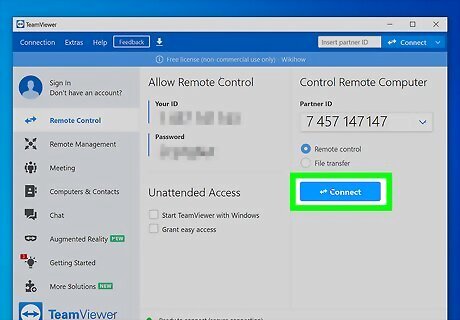
Connect to the target computer from your computer. Now you can connect to the target computer any time it's connected to the internet. Here's how: Click the Remote Control menu in the left panel. Enter the ID of the target computer into the "Partner ID" field. Select "Remote control" if not already selected. Click Connect. Enter the password you created and click Log On. Since the other computer is configured to allow you to sign in whenever you like, you shouldn't have to touch the target computer again once you've installed and set up TeamViewer. Tip: You'll be able to control the other computer as well, allowing you to move files and folders, turn off the computer, and so on.


Comments
0 comment