views
X
Research source
Because port 25 is often exploited by spammers, it's closed by default in Windows Firewall. Fortunately, it's easy to open port 25 on any version of Windows—just make sure to only allow connections from users you trust. This wikiHow article will teach you how to open port 25 on Windows Firewall using Window 11, Windows 10, Windows Server 2019, and virtually any other version of Windows.
- Open Windows Defender Firewall from the Control Panel.
- Go to Advanced Settings > Inbound Rules > New Rule.
- Select "Port," enter 25, click "Next," and choose your preferences.
Windows Vista and Later
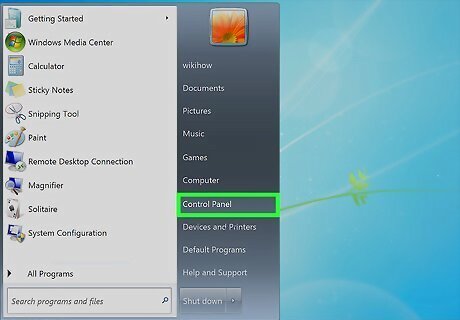
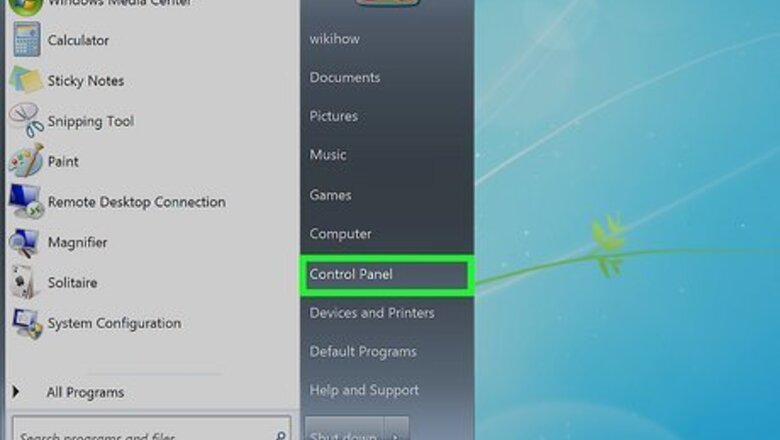
Open the Control Panel. If you're using a modern version of Windows like Windows 11, Windows 10, or even Windows 8.1, type control panel into the Windows Search bar, then click Control Panel in the search results. If you have Windows Vista, click Control Panel in the Start menu. This method will work for Windows 11, 10, 8.1, 7, and Vista. It will also work for Windows Server 2012, 2016, 2019, and 2022.
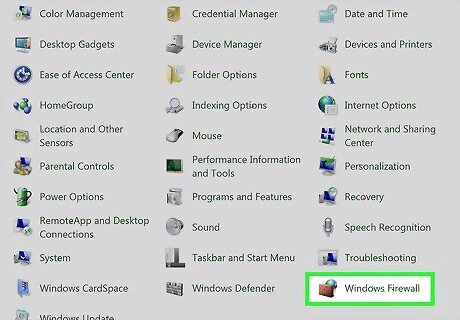
Click Windows Defender Firewall. If you're using an older version of Windows, this will be called Windows Firewall instead. If you don't see this option, click the drop-down menu and select Small icons first.
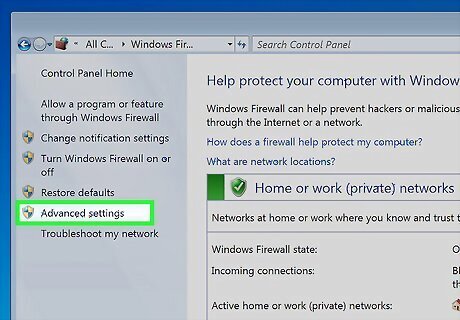
Click Advanced settings. This is in the left panel.
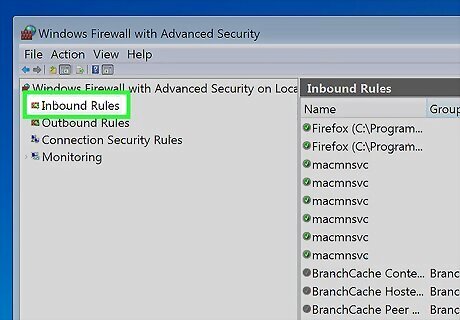
Click Inbound Rules. It's at the top of the left panel. This displays your current firewall rules pertaining to inbound connections.
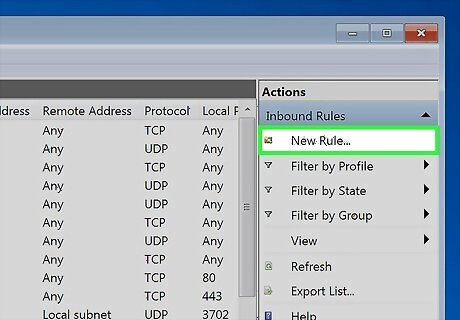
Click New Rule. It's at the upper-right corner of the window under "Actions."
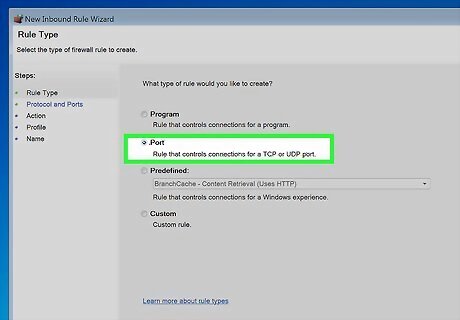
Select "Port" and click Next. This tells the New Inbound Rule Wizard that you want to make changes to a port.
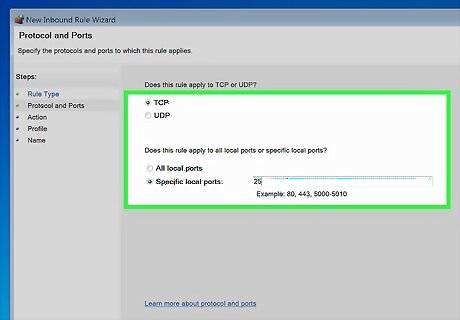
Select TCP port 25 and click Next. Select "TCP" at the top, select "Specific local ports" in the second section, and then type 25 into the "Specific local ports" box.
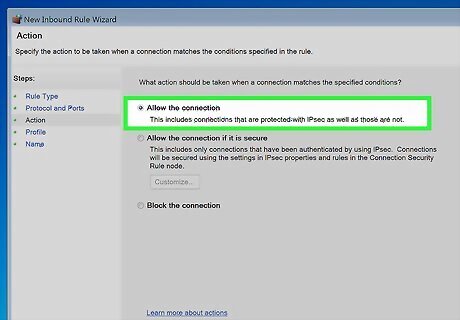
Choose which connections to allow and click Next. On the next screen, choose one of the two "Allow" options that best fits how accessible you want to make port 25 to other users. Choose Allow the connection to allow any connection, even if they're not protected by IPsec. This is not the safest option, as you won't be able to limit connections by authenticated users or systems on the network. Choose Allow the connection if it is secure to allow only IPsec authenticated connections. If you choose this option, you can click Customize… to select security options, such as requiring incoming connections to be encrypted. Alternatively, if you wanted to block access to port 25, you could choose Block connections.
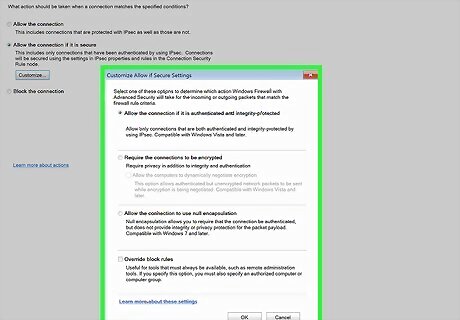
If only allowing secure connections, select who can connect. The next screens will be a little different depending on which options you selected earlier. If you're allowing all unsecured connections on port 25, just skip to the next step. To only allow users with accounts on this system to connect, check the box under "Authorized users," and then add the users who should be able to send mail through port 25 on this server. To block certain users from port 25, check the box under "Exceptions," then add the users you want to block. When you're finished, click Next. On the next screen, you can authorize access to port 25 from specific devices on your network, or block certain devices. If you chose authorized users, it's not required that you specify specific computers. Click Next to continue.
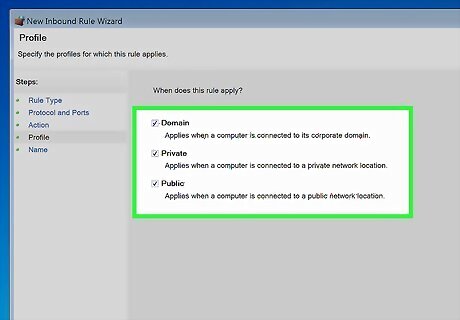
Choose where the rule should apply and click Next. Whether you're opening port 25 to secure connections only or all connections, you'll now see the "Where does this rule apply?" screen. You can choose to only keep the port open when the PC is on a specific domain, a private network, a public network, or any/all of the above.
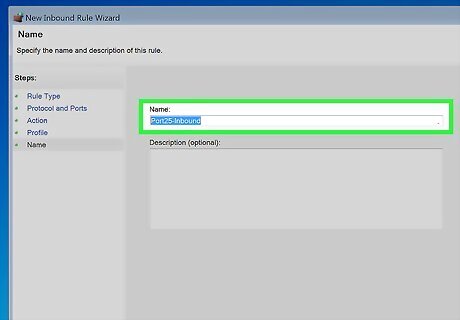
Name the rule and click Finish. Type a name like "SMTP" or "Outbound mail" so you can easily find the rule on the "Inbound Rules" list later. Then, click Finish to finish opening port 25.
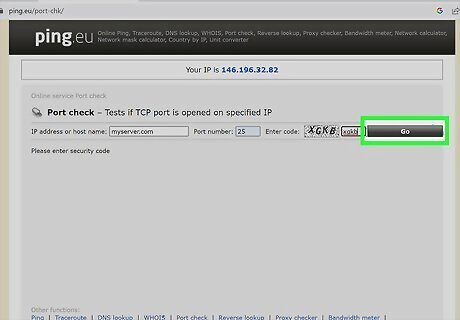
Test the port. To make sure the port is open and accessible from within your network, use telnet. First, make sure your mail server is open and ready to accept connections. Open the Command Prompt as an administrator. If you're using Windows 10 or Windows 11, run this command to enable telnet: dism /online /Enable-Feature /FeatureName:TelnetClient. Type telnet yourservername.yourserver.com 25 (replace the hostname with your server's hostname or IP address) and press Enter. Right-click Windows Defender Firewall with Advanced Security at the top-left corner of your Firewall settings and choose Properties. Select your profile, set inbound connections to "Allow," and save your changes. If you still can't connect, you may have another firewall rule that overrides this one, or you need to set up port forwarding for port 25 on your router.
Windows XP
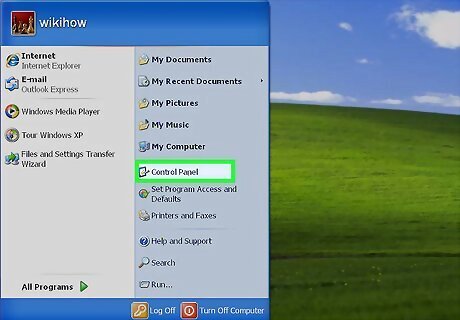
Open the Control Panel. You can do so by clicking the Start menu and selecting Control Panel.
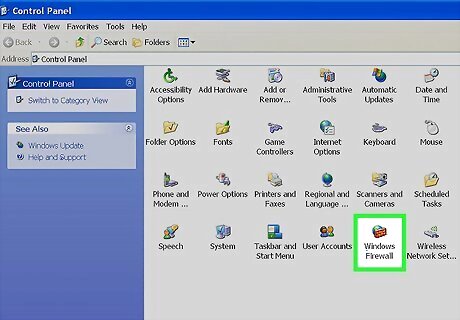
Double-click Windows Firewall. If you don't see this option, click Switch to Classic View in the left panel first.
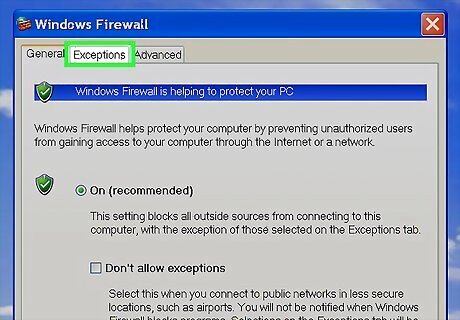
Click the Exceptions tab. It's at the top of the Windows Firewall window.
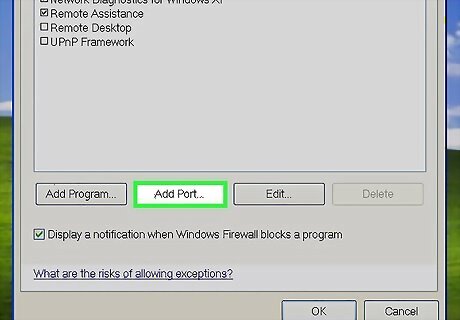
Click Add Port. This button is below the list.
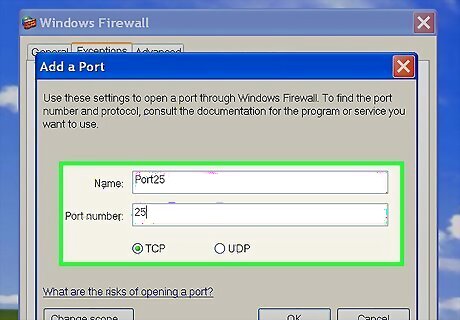
Open port 25 and click OK. Type a "25" into the port number field. You'll also want to give this port a name, such as SMTP or Outbound Mail. Click OK to save the rule. "TCP" is selected by default. Don't change this setting.
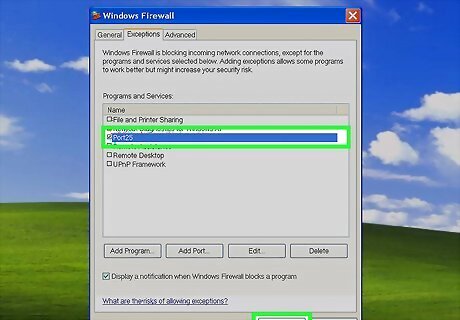
Click OK to save your changes. If the port is not working, return to Windows Firewall, click the General tab, and remove the checkmark from "Don't allow exceptions."


Comments
0 comment