views
- The basic syntax for ping is ping <ip address>, where <ip address> is the address of another device.
- To ping an iPv6 IP address instead of an iPv4 address, you'll use ping -6 <ip address>.
- "Destination host unreachable" means the host is down or that there is no route from your Linux computer to that host.
- "Request timed out" sometimes indicates problems on the remote computer or network, but could also just mean that there's a firewall blocking the connection.
How Ping Works
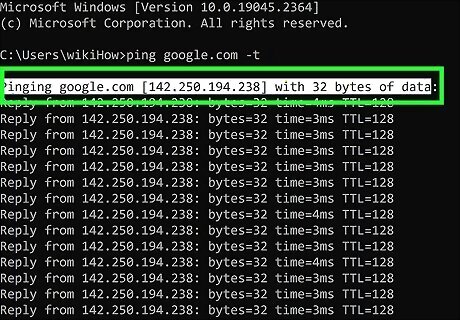
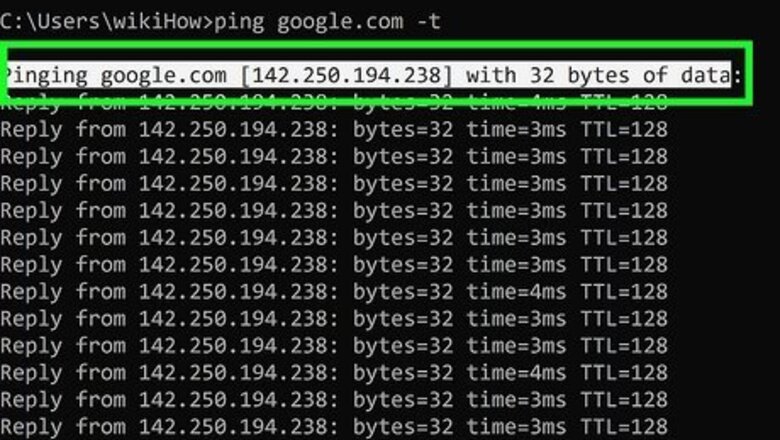
The ping command works by sending small packets of data to a server or host and waiting for a reply. You can ping another computer on your network, a website, a printer, a smartphone, or any other location on the internet that has a hostname or IP address. The packets sent by ping include an ICMP ECHO_REQUEST, which is basically a request that says "reply if you get this."
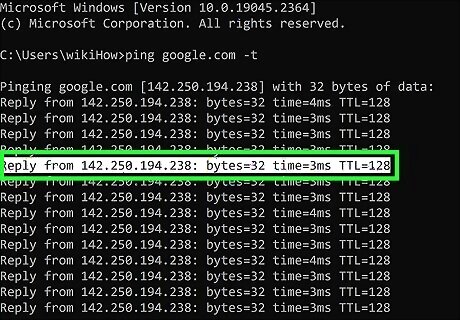
When the host receives the ping request, it will reply with echo packets. These replies contain lots of helpful information, including the amount of time it took for each packet to reach the destination, and whether any packets were lost along the way. This information is easy to interpret and super helpful for diagnosing network problems.
How to Ping

Open a Terminal window. You can do this on most versions of Linux, including Ubuntu, by pressing Ctr + Alt + T. You can also double-click the Terminal app icon in your app list.

Run a basic ping. At the prompt, type ping followed by the IP address, hostname, or domain name that you want to test. When you press Enter, you'll see the echoed results as individual entries. Basic ping examples: To ping a website like Facebook, you'd type ping www.facebook.com or ping facebook.com. To ping an IPv4 IP address, such as 10.0.0.1, you'd type ping 10.0.0.1. To ping an IPv6 IP address, you'll add the -6 option. To ping Facebook's IPv6 address, you'd use ping -6 2a03:2880:f02c:13:face:b00c:0:3. You can also ping your own computer (localhost) to make sure your network adapter is working property. To do this, you'd use ping localhost or ping 127.0.0.1. For more ping examples, see Advanced Ping Examples.

Press Ctrl+C to stop the ping. In Linux, the ping command will continue to display echo results until you stop the process with this keyboard shortcut. Once you stop the ping, you'll see a statistics summary of the ping right above the prompt.
Understanding Ping Results

Check the ping statistics. At the bottom of your ping replies, you'll see a section that says "(host or IP) ping statistics." In Linux, you'll find helpful information in this section, including: Packets transmitted and packets received. For example, if you stopped the ping after sending 15 packets, you'll see "15 packets transmitted," followed by the number of packets received by the host. Packets that are sent but not received indicate packet loss. If some packets are lost, you'll notice a slower or inconsistent connection between your computer and the host. For example, lag in games and sluggish downloads. Percentage of packets lost. For example, if none of the packets were received by the host, you'll see "100% packet loss" in the reply. If 2 out of 4 were received, you'll see "50% packet loss." Packet loss can be caused by many things, including network congestion, router problems, network hardware issues, and configuration issues on the remote server. If 100% of packets are lost, there might not actually be a problem. Some servers discard ICMP packets as a security measure to avoid ping flooding, a type of denial of service attack. Round trip time (RTT). This tells you how long it took for each packet to be sent to the host, plus the amount of time it took for Linux to receive the reply in milliseconds (MS). RTT is shown as multiple values: The minimum RTT (the shortest amount of time), average RTT, MAX RTT (the longest), and then MDEV RTT (mean deviation). You'll also see a "time" value, which tells you the total amount of time the entire process took from start to finish.
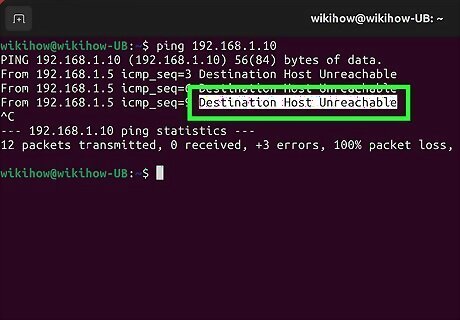
Interpret ping errors. If you're pinging a server, you might encounter one of these errors: Unknown host: If you're trying to ping host or domain name that cannot be resolved, you'll see this error. This could mean the host or domain does not exist, but also may mean the name cannot be translated into an IP address by your DNS servers. Destination host unreachable: This error means your computer was unable to send any packets to the address. This could indicate a problem on your network, or somewhere on the internet between your own network and the remote host's. Request timed out: In this case, the problem is definitely not related to your own computer or network. Your computer sent the ping request, but did not receive a reply. The host may not be online, there could be a network problem on the host's end, or the ping could've been blocked by the host's firewall. Name or service not known: This error means the hostname or address you're trying to ping does not exist. If the host does exist, there's a problem with your network configuration.
Advanced Ping Examples
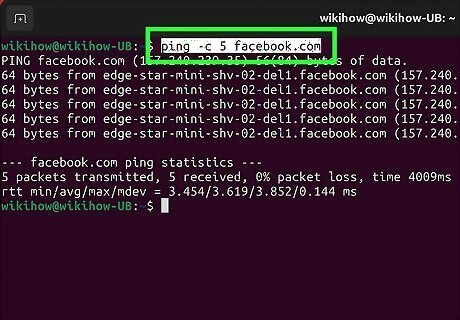
Specify the number of packets to send. As you know from your basic ping, Linux will ping the destination repeatedly until you stop the ping by pressing Ctrl + C. If you just want to do a quick ping test that ends on its own, you can specify the number of packets to send using the -c option. For example, to send 5 packets to facebook.com, you'd use ping -c 5 facebook.com. The ping will stop on its own after 5 packets are sent and report the results. As an alternative, you can use the -w option to stop the ping after a number of seconds instead of specifying the packet number. For example, to ping Facebook for 10 seconds and then display the results, you'd use ping -w 10 facebook.com.
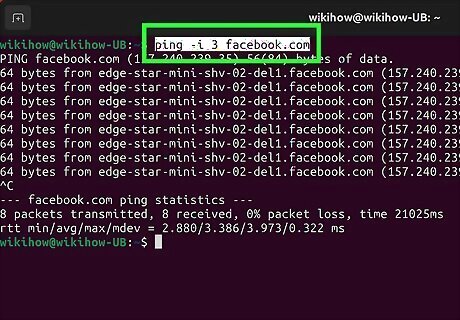
Change the interval between packets. By default, a ping waits one second between each packet sent. If you want to increase or decrease the time between packets sent, you can use the -i option with ping. To increase the wait to 3 seconds between packets in your ping to Facebook, you'd use ping -i 3 facebook.com. To decrease the wait to half of one second, you'd use ping -i 0.5 facebook.com.
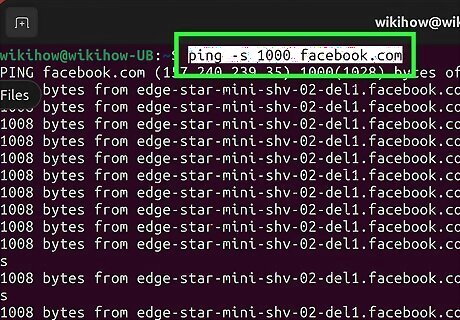
Change the size of your packets. By default, ping packets are 56 bytes, which actually translates to 64 ICMP data bytes. You can send larger or smaller packets using the -s option. For example, if you're running into performance trouble on your own network, you can try to send larger packets to see if your traffic is throttled. To send 1000 bytes instead of the default, you'd use ping -s 1000 facebook.com.
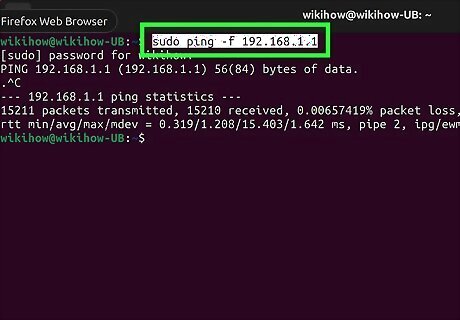
Do a ping flood to test your network's performance. A great way to see how your network performs under heavy load is to "flood" a device on your network with ping requests. This outputs packets as fast as they return or 100 times per second, whichever is greater. You can do this using the -f option.
Proceed with caution, as a ping flood can overload your network.
Because you'll need root access to do a ping flood, you'll need to preface the command with sudo.
To perform a flood ping, use sudo ping -f
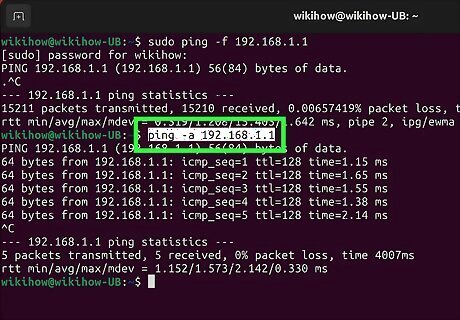
Play a sound when a host is reachable. If you're testing a host and want to run a continuous ping until the host is reachable again, you can use the -a option. For example, if the local IP address 10.0.0.2 is unreachable and you want to know when it comes back up, you'd use ping -a 10.0.0.2. Once the host is reachable, the ping will run normally and display the output.

Skip the live echo responses and only display the summary. If you don't want to see the live results of your ping and only need the statistics, you can use the -q command. For example, ping -q facebook.com. However, you won't see the statistics at all until you press Ctrl + C. Because of this, you'll usually use -q in conjunction with specifying the number of packets to send. A better way to use -q is with the -c flag, which allows you to specify the number of packets to send. For example: ping -c 5 -q facebook.com. In this example, you'll send 5 packets of data to Facebook only. Once the packets are sent and the echoes are received, the statistics will appear.


Comments
0 comment