
views
At the End of a Line Segment
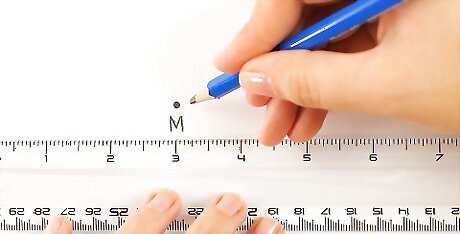
Mark the vertex of your angle anywhere on the paper. Let us name this point as M.
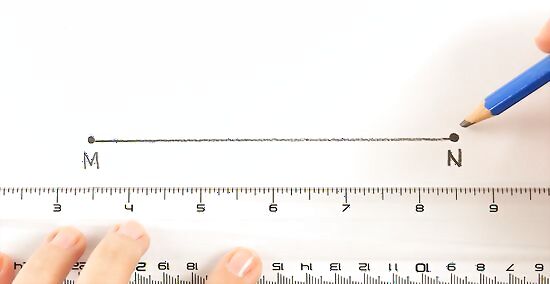
Draw a ray MN, extending in any direction and of any length. This will be one of the arms of our angle.
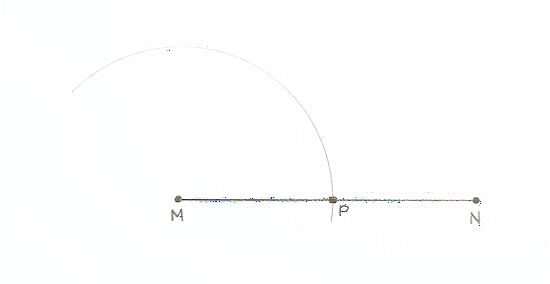
Place tip of the compass on point M and draw a circle cutting the ray MN at some point (say P).
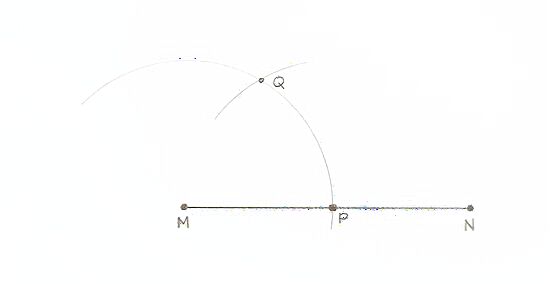
Keep the width of the compass the same. Then place its tip on P and draw an arc cutting the circle at some point (say Q).
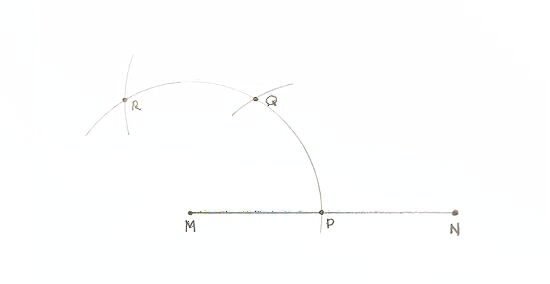
Keep the width of the compass the same. Place its tip on Q and draw another arc cutting the circle at another point (say R).
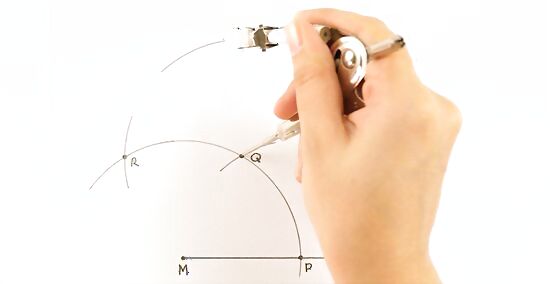
Keep the tip of the compass still on Q. Draw another arc somewhere outside the circle. For carrying out this step, you can set the width of the compass to any measure.
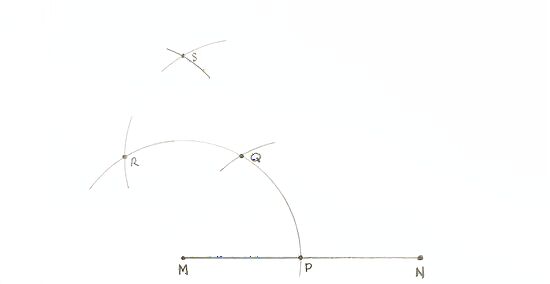
Keep the same width of the compass (as set in the previous step). Now place its tip on R and draw another arc which cuts the arc drawn in the previous step at some point (say S).
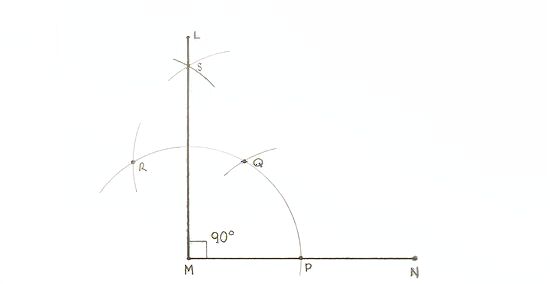
Connect the points M and S with a straight line. Extend it to form a ray ML. The measure of the angle LMN is 90.
Through the Middle of a Line Segment
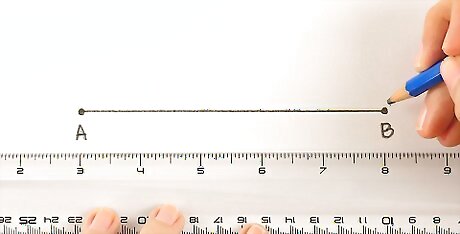
Draw a straight line. On a piece of paper, draw a line segment of any convenient length. Make it horizontal for the sake of simplicity, but it could be at any angle. Label the line segment AB.
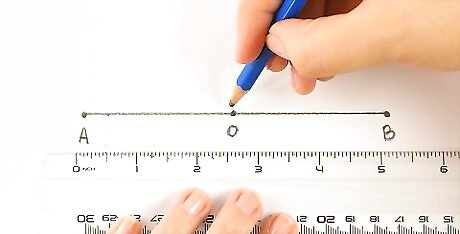
Pick any point on AB. Mark it, and label it O. O can be anywhere on the line segment, including at either end point (A or B). For convenience, let's put O somewhere near the middle of AB. The line segment could now be referred to as AOB.
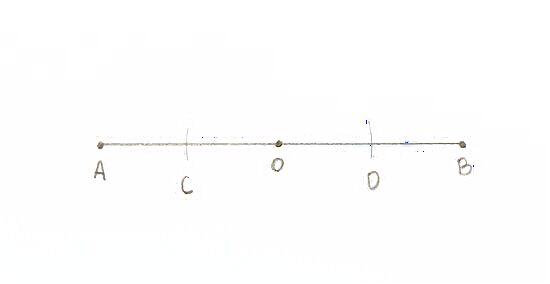
Grab a compass. Open the compass to a radius a little shorter than either AO or OB. Now place the compass point at O. Strike short arcs through AB on either side of O. The two arcs should have the same radius. Label those two points of intersection C and D. Now the line segment could be referred to as ACODB.
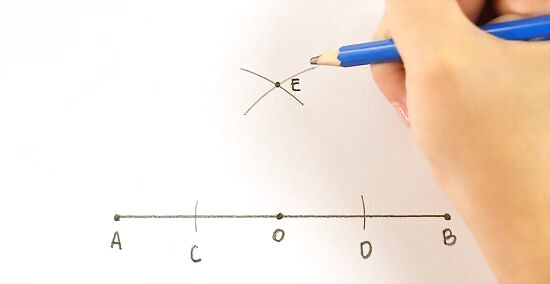
Strike two more arcs. Place the compass point at C, and strike an arc to one side of the line segment. Then place the compass point at D, and strike a second arc of the same radius and on the same side of the line segment. Make sure those two arcs intersect. Call that point of intersection E.
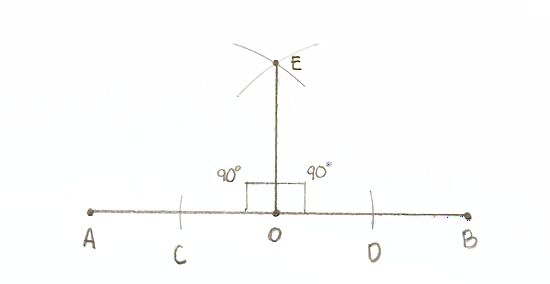
Draw the 90° angle. Draw a straight line from E to O. Line segment EO forms a 90° angle with line segment AB. It actually forms two 90° angles at O. If you were to extend EO beyond AB, you would form four 90° angles at O. Note that you can draw a 90° angle at either end of line segment AB if you want to (in other words at point A or point B). Simply extend AB beyond A or beyond B, and then follow the above steps. Point A (or point B) would serve as point O in the above instructions. This is essentially the same method featured in How to Construct a Perpendicular Line to a Given Line Through Point on the Line, Method 2.


Comments
0 comment