views
Finding the Serpentine Belt
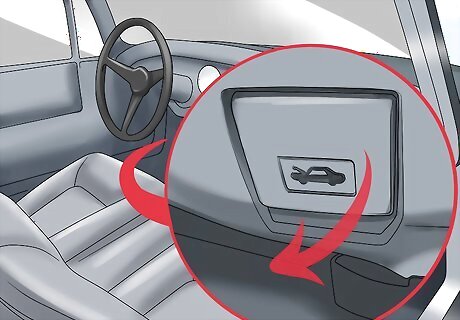
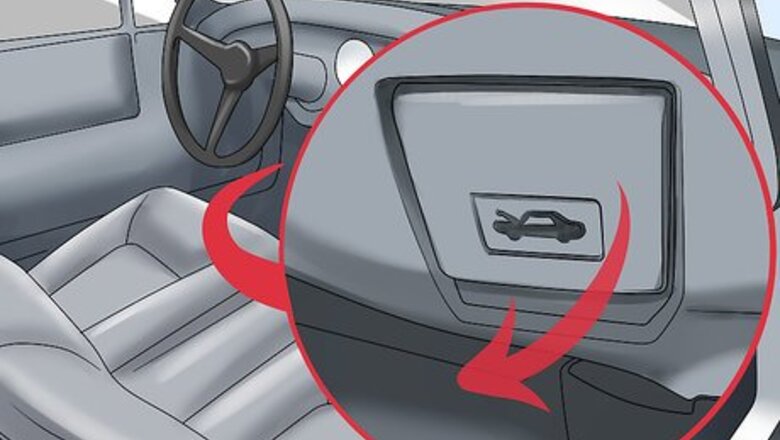
Pull the hood release inside the cabin of the vehicle. To access the serpentine belt, you will need to open the hood of the vehicle. The hood release can usually be found near the door on the driver's side of the vehicle. With the hood released, you will also need to release the safety latch located at the front of the vehicle. If you are having difficulty locating the hood release or safety latch, refer to your owner's manual for guidance.
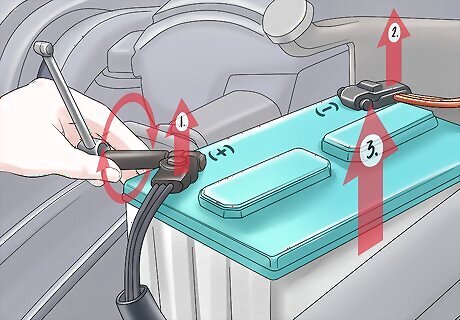
Disconnect the battery. You should always disconnect your battery before starting an automotive project. Use the appropriate sized wrench or socket to loosen the nut holding the black ground cable on the negative terminal of the battery. Slide the cable off of the terminal and tuck it to the side of the battery. You will not need to disconnect the positive terminal.
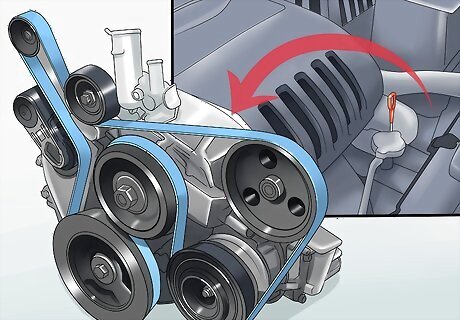
Locate the serpentine belt. Depending on the engine in your vehicle, the serpentine belt may be located at the front of the engine bay, or it may be along one side. There may be engine covers in the way, so be prepared to remove them if need be. Engine covers may be held in place by plastic clips, so take care not to break them as you remove the covers. If you cannot find your serpentine belt, refer to the service manual for your specific vehicle.
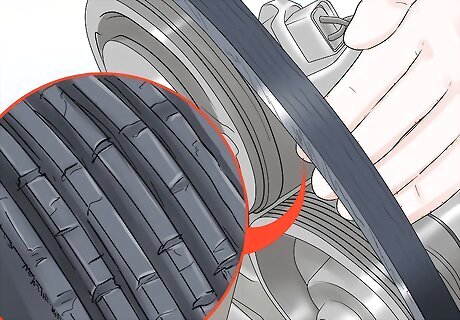
Look for signs of damage or wear on the belt. Once you have located the serpentine belt, inspect it visually for signs of damage. If the belt is frayed, coming apart, or has marks that indicate that it has been rubbing on something, it will need to be replaced. It is usually easy to determine if a belt needs to be replaced, as they tend to crack or lose chunks when they are overworn. Most serpentine belts need to be replaced every 40,000 to 70,000 miles. If there are signs of the belt rubbing on something, make sure to identify and repair whatever it was rubbing on to avoid damaging the new belt.
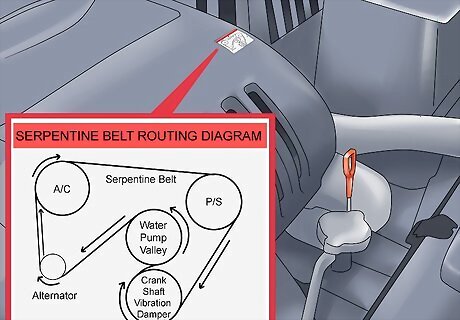
Find the serpentine belt routing diagram. Many cars come with a sticker in the engine bay that shows exactly how the serpentine belt is supposed to be routed through the various pulleys on the engine. If your vehicle does not have a sticker, you will need to find another way to remember how the belt should be run. Look in the owner's or service manual for your specific year, make and model vehicle for a diagram. You can also take a picture of the existing belt with your cell phone to use as a guide when installing the new one.
Relieving the Tension on the Serpentine Belt
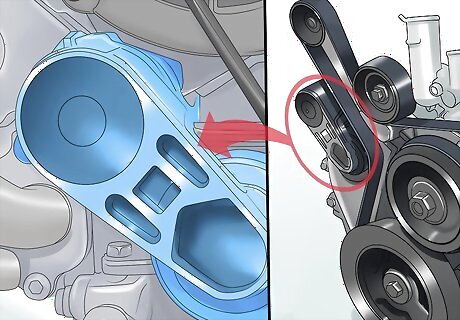
Determine if there is a belt tensioner pulley. Depending on the application, your serpentine belt will either have tension placed on it using a movable bracket or an auto tensioner pulley. This pulley uses an internal spring to apply consistent pressure to the belt at all times. If your vehicle does not have a tensioner pulley, the alternator bracket is likely how tension is set on the belt. Refer to your vehicle's service manual to confirm what type of tensioner your vehicle uses if you aren't sure.
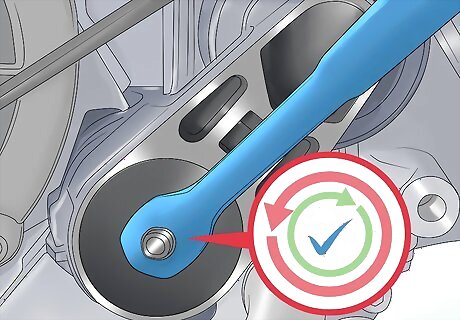
Use a wrench to relieve the auto tensioner. Auto tensioners have either a hole that will fit a half inch drive ratchet, or a bolt you can use a socket to apply pressure to. Insert the wrench or place the socket over the bolt on the tensioner and twist it away from the belt to relieve the tension on it. Depending on the positioning of the tensioner pulley you may need to twist the tensioner clockwise or counterclockwise. Be sure to use the right size socket to avoid stripping the bolt head on the tensioner.
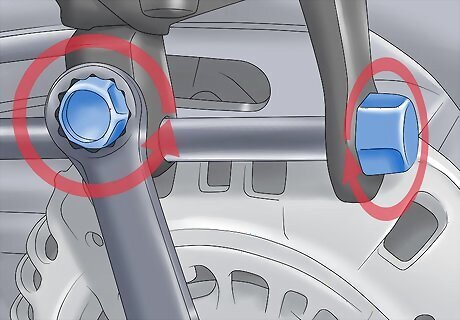
Loosen the bolts in the alternator bracket. If your vehicle uses the alternator bracket to apply tension to the belt, loosen the two bolts that pass through the long eyelets on the bracket. As you loosen the bolts, the tension on the belt will likely move the alternator toward the engine and relieve the pressure. Loosen the bolts enough to move the alternator, but don't remove them.
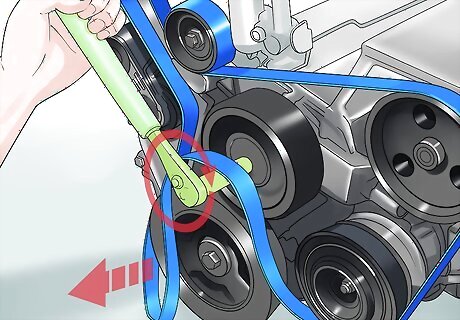
Pull the belt off of the pulleys. With the tension relieved from the belt, pull it off of the pulley that has been placing tension on it, then remove it from the around the rest of the pulleys on the engine. If the belt is severely damaged, be sure to remove any parts that may have come off of it as well.
Replacing the Serpentine Belt
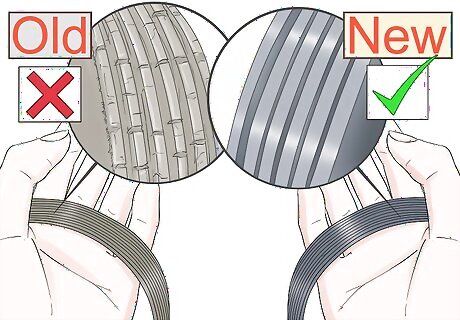
Compare the new belt to the old one. Look at the new belt in comparison to the old one to be sure they are the same width and have the same number of ribs going across the belt horizontally. The old belt may be slightly longer than the new one due to stretching. If the new belt is not the same width as the old one, it is the wrong belt. Make sure the new belt doesn't show any signs of damage from the factory or it may tear after you install it.
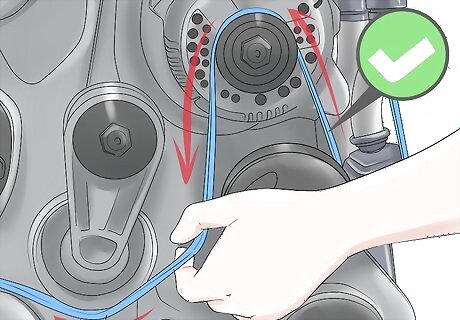
Route the belt through the pulleys. Run the new belt through the pulleys in exactly the same way the old one was. Refer to the belt diagram in your vehicle's owner's manual or the picture you took of the belt before removing it to guide you. The belt should be long enough to route around all of the pulleys except the tensioner until you relieve the pressure on it. If the belt is loose after routing it, it is either the wrong size belt or you've routed it incorrectly.
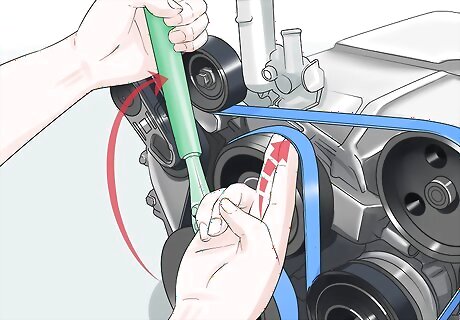
Apply pressure on the auto tensioner and put the belt over it. Use the same wrench to loosen the auto tensioner pulley, then pull the belt over it. Once the belt is in place, release the pressure on the tensioner so it holds the belt in place. It may be difficult to apply pressure to the tensioner and route the belt, so you may want to ask a friend to help.
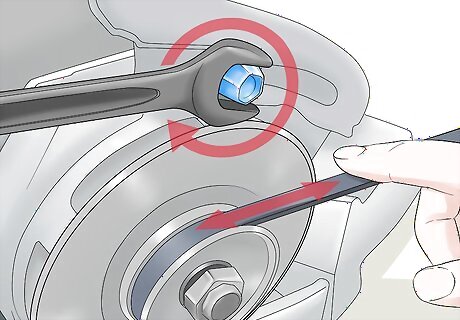
Increase the tension on the belt. If your vehicle does not have an auto tensioner, insert a pry bar or piece of wood between the alternator and the engine. Run the belt over the alternator pulley, then use the bar to pry the alternator away from the engine and increase the tension on the belt. Tighten the bolts again as you apply tension. You may need help tightening the bolts as you apply pressure to the alternator. Be careful not to pry against anything plastic in your engine bay to avoid breaking anything.


Comments
0 comment