views
- To create the hotspot, use this command: netsh wlan set hostednetwork mode=allow ssid=NETWORK key=password
- To start the hotspot, use this command: netsh wlan start hostednetwork
- If you're using Windows 10 or Windows 11, create the hotspot in Settings instead of Command Prompt.
Creating the Hotspot
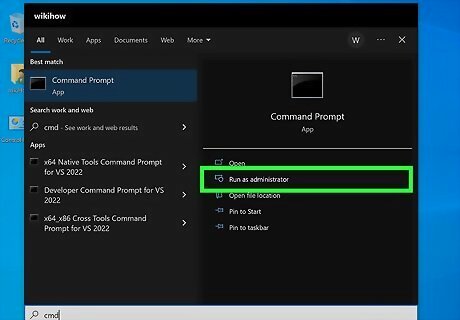
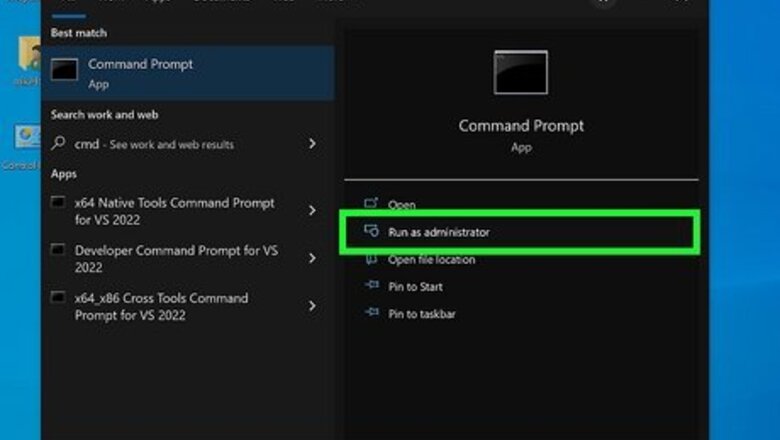
Open the Command Prompt as an administrator. You will need to have administrator access to turn on your PC's Wi-Fi hotspot with Command Prompt. Press the Windows key on your keyboard or click the Start menu. Type cmd. Right-click Command prompt and select Run as administrator. Click Yes or confirm your administrator password to continue.
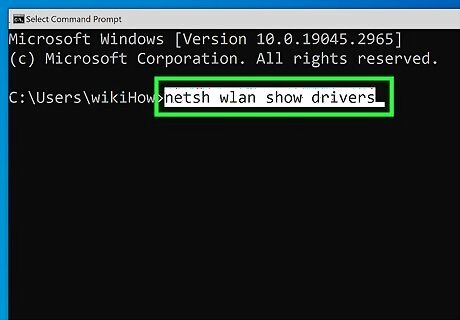
Type netsh wlan show drivers and press ↵ Enter. This command displays information about your wireless drivers.
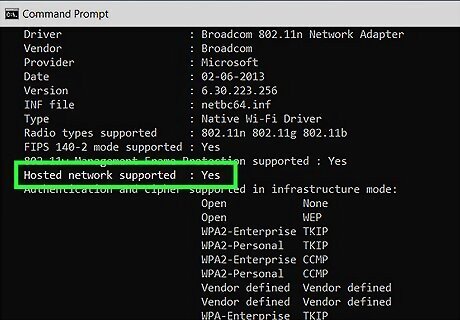
Look for Yes next to "Hosted network supported." If you see "Yes" here, your computer supports the Hosted Network feature, which allows you to share your internet connection via Wi-Fi from Command Prompt. If you see No here and are using Windows 8.1 or Windows 7, see Fixing No Hosted Network for a fix. If you see "No" and are using Windows 10 or Windows 11, your hardware does not support creating a Wi-Fi hotspot using the hosted network method. Microsoft deprecated this feature in Windows 10, so most Wi-Fi drivers no longer support it. To create a Wi-Fi hotspot, see How to Create a Hotspot in Windows 10 or How to Create a Hotspot in Windows 11 instead.
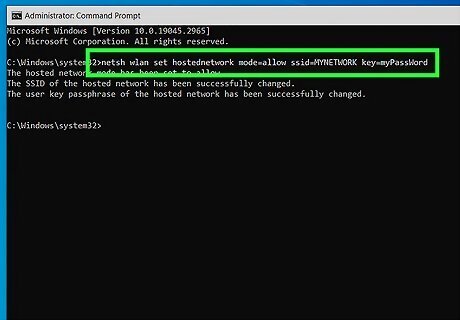
Enter the command to create your Wi-Fi hotspot. In the following command, replace "NETWORK" with the name of the hotspot you want to create, and "PASSWORD" with the password people should use to connect: Type netsh wlan set hostednetwork mode=allow ssid=NETWORK key=PASSWORD and press Enter. You should see the message "The hosted network mode has been set to allow," and some information about the SSID and passphrase being changed.
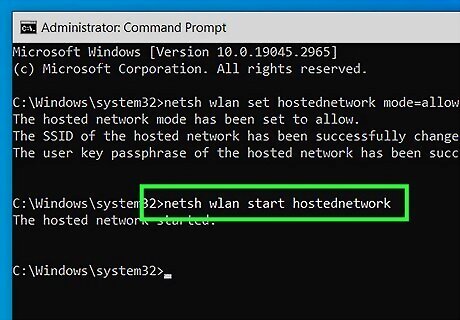
Type NETSH WLAN start hostednetwork and press ↵ Enter. This will turn on your Wi-Fi hotspot.
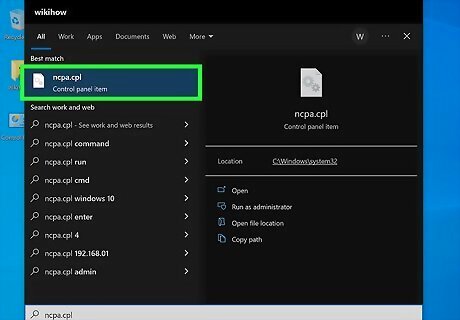
Open the Network & Sharing Center. Now that you've created a Wi-Fi hotspot, you'll need to allow it to share your main internet connection. To get started, type ncpa.cpl into the Windows search bar and press Enter. You'll also find it in Control Panel, or by pressing Ctrl + X and selecting Network Connections. When you open Network and Sharing Center, you should see a connection for your hotspot, which should have a name like "Local Area Connection" followed by a number.
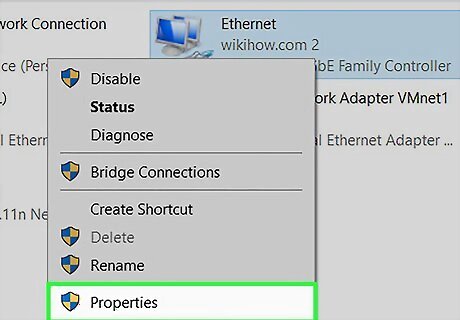
Right-click your primary internet connection and select Properties. Make sure to do this on the adapter you use to connect to the internet. For example, if you connect to the internet via Wi-Fi, right-click your Wi-Fi adapter and choose Properties.
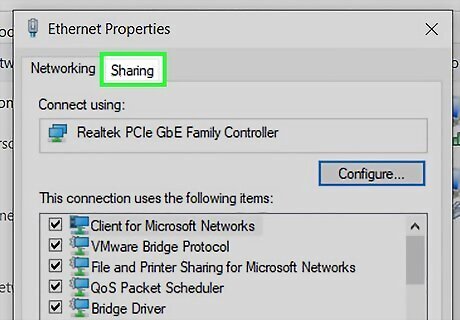
Click the Sharing tab. This option is at the top of the window.
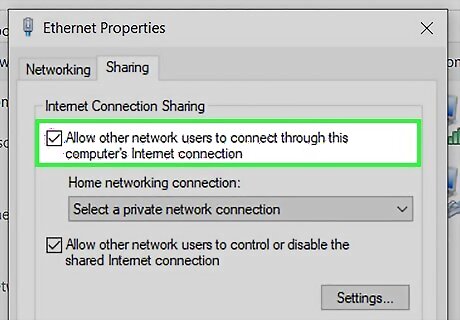
Check the "Allow other network users to connect" box. It's at the top of the window.
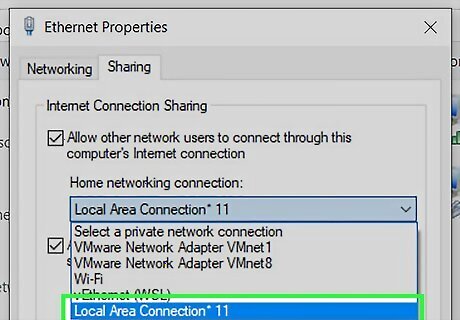
Select your hotspot adapter from the menu. Under "Home networking connection," click the menu and select Local Area Connection (number) (the device you created earlier).
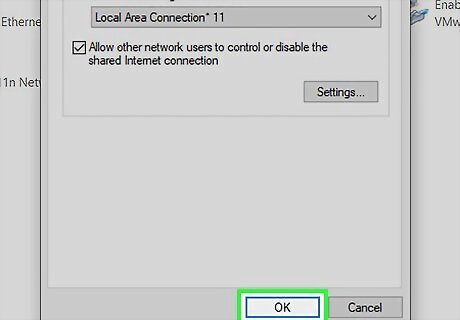
Click OK. The Wi-Fi hotspot you created in Command Prompt is now ready to use. Nearby devices can now connect to your PC wirelessly to share its internet connection.
Fixing No Hosted Network
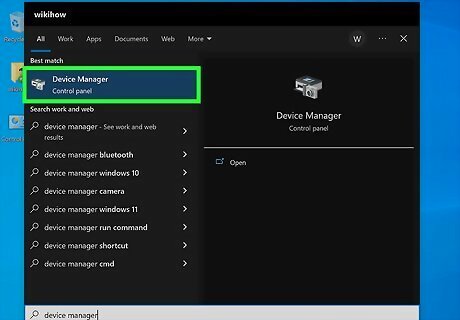
Open Device Manager. In the Windows search box, type device, then click Device Manager to launch it.
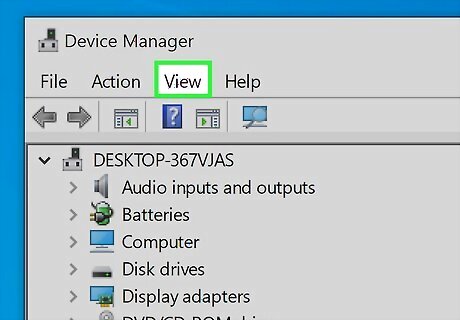
Click the View menu. It's at the top of the window.
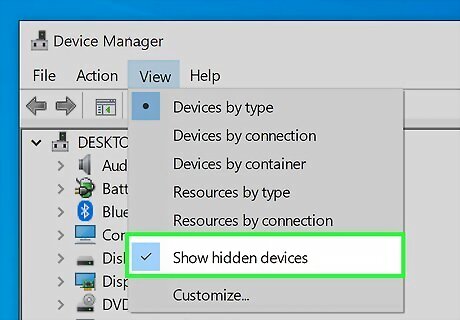
Select Show hidden devices. This unhides the adapter you'll need to enable your hosted network.
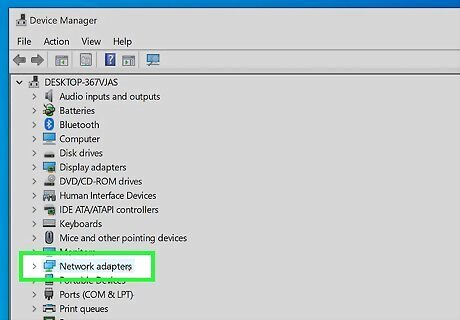
Expand the "Network adapters" menu. You should now see several adapters listed.
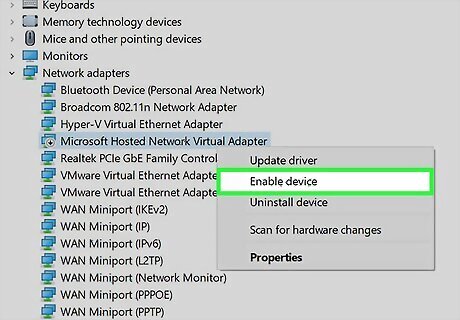
Right-click "Microsoft Hosted Network Virtual Adapter" and choose Enable. If you see this option, enabling it will typically enable hosted network support. You can test this by returning to Command Prompt and typing netsh wlan show drivers. If you don't see Microsoft Hosted Network Virtual Adapter, you may be able to install it. Right-click your Wi-Fi adapter and select Update driver software. Click Browse my computer for driver software. Click Let me pick from a list of device drivers on my computer. Select the first driver and click Next. When the driver is installed, check for Microsoft Hosted Network Virtual Adapter again. If you don't see it, return to the driver list and try the next driver. Repeat until you install a driver that comes with the proper adapter. If none of the drivers help, it's likely that your hardware doesn’t support enabling a Wi-Fi hotspot from Command Prompt.


Comments
0 comment